
When you run VisualSwift, you should see the standard iPadOS document browser view shown below:

When you create a new document, it should start as follows:
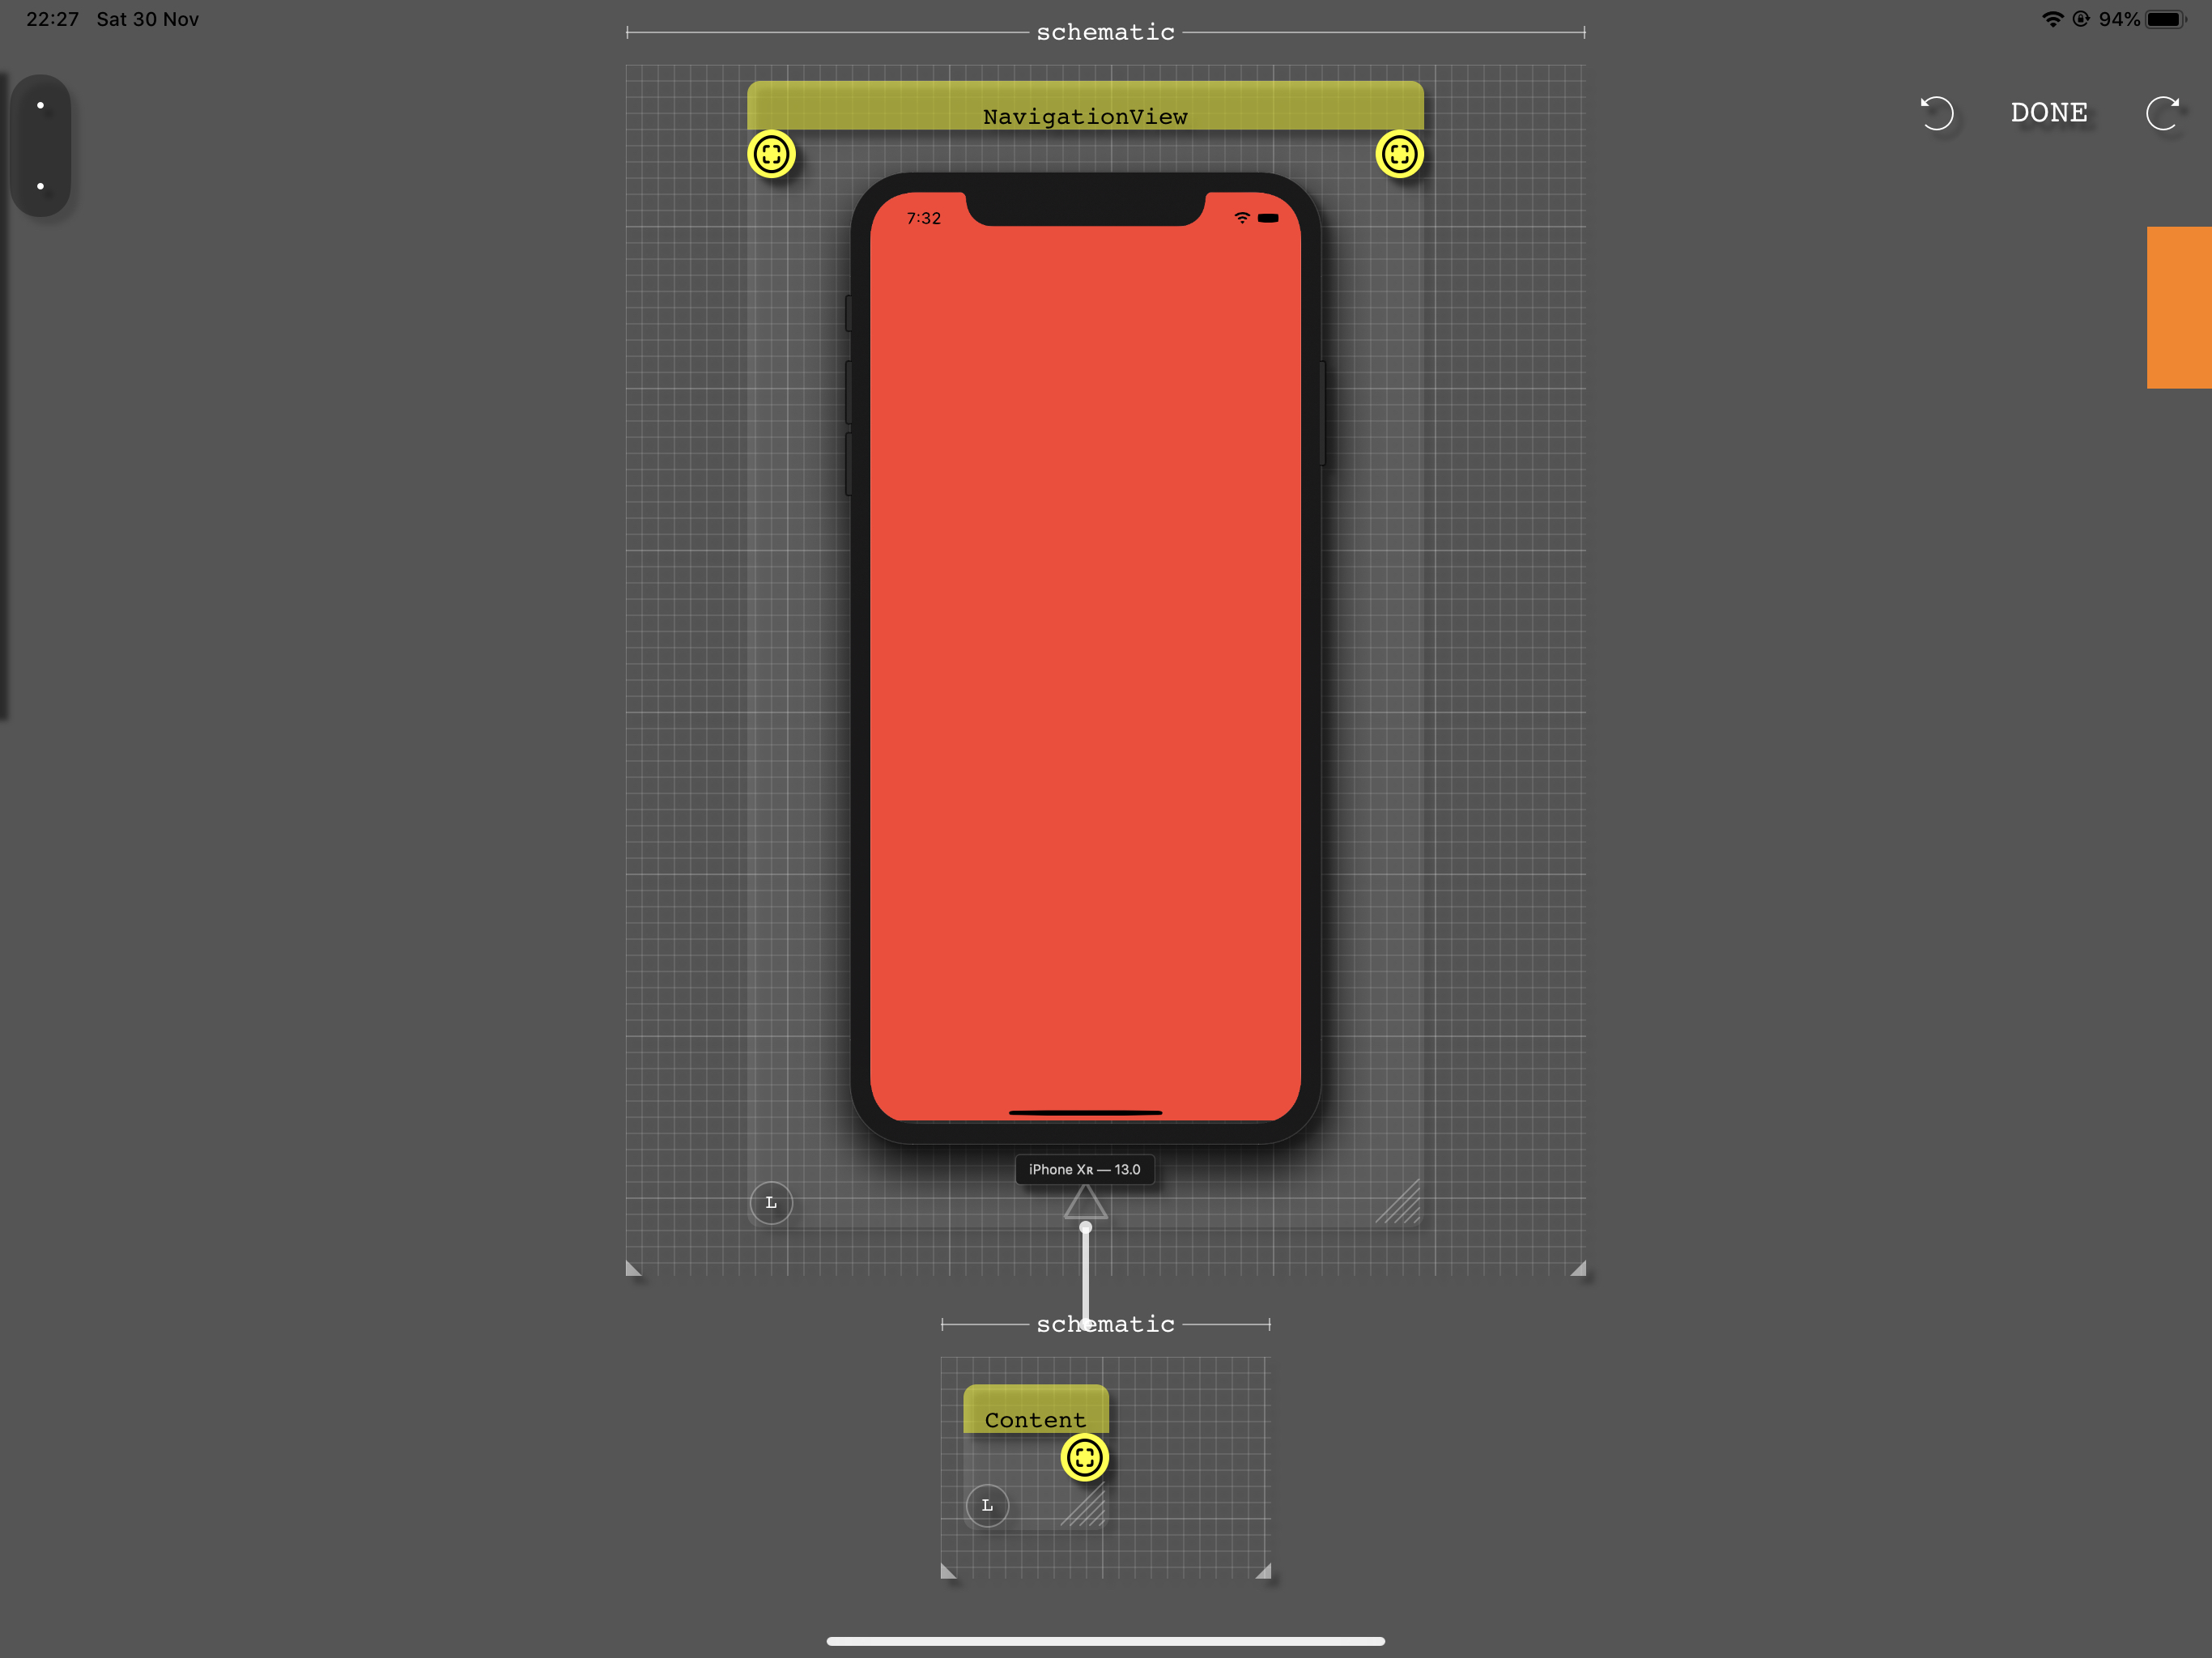
There are several aspects of the screenshot above that are worth understanding. There is a small schematic below a bigger one. The bigger schematic is the root of the app, it contains one component of type NavigationView.
The bottom of the NavigationView is connected to another schematic with a Content component. The smaller schematic represents what is inside the NavigationView. In the next step we’ll connect the Content component to other views that will show up as the contents of the NavigationView.
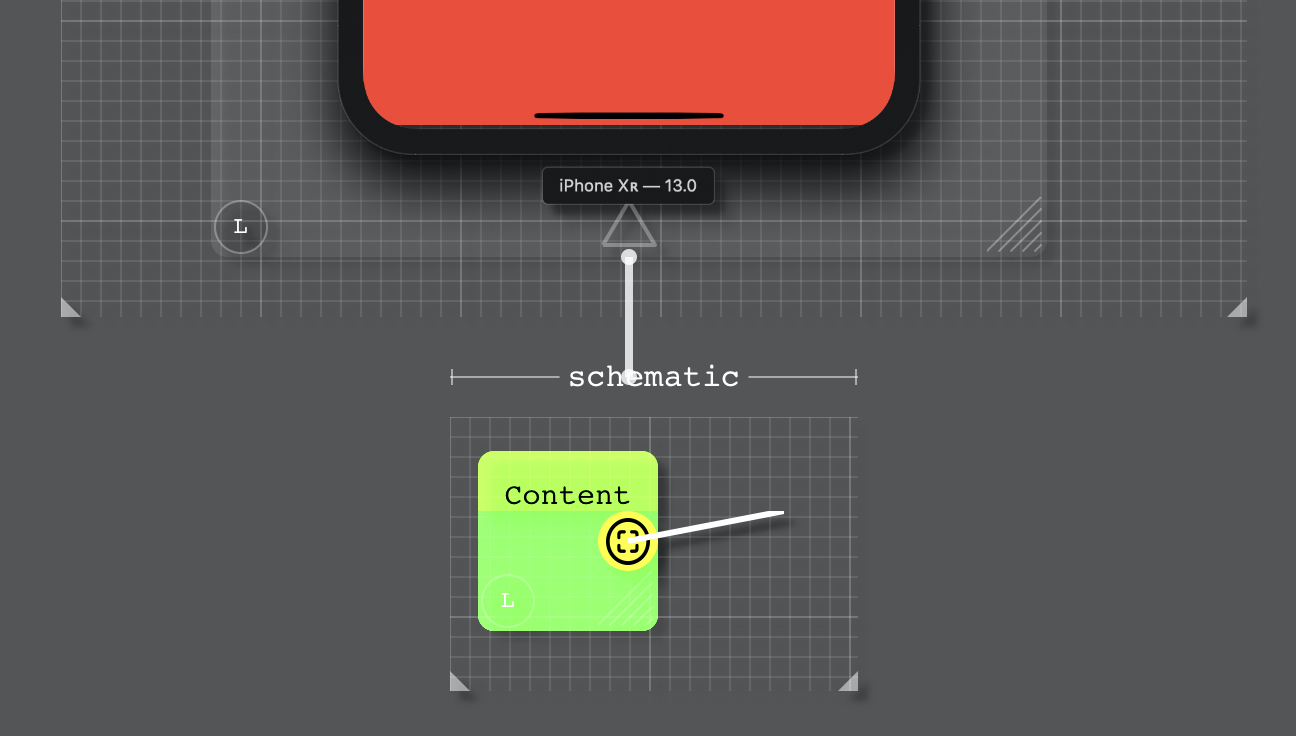
To start describing the contents of the NavigationView, drag a link from the Content output ( input and outputs are represented by circular connectors, inputs to the left and outputs to the right of components ).
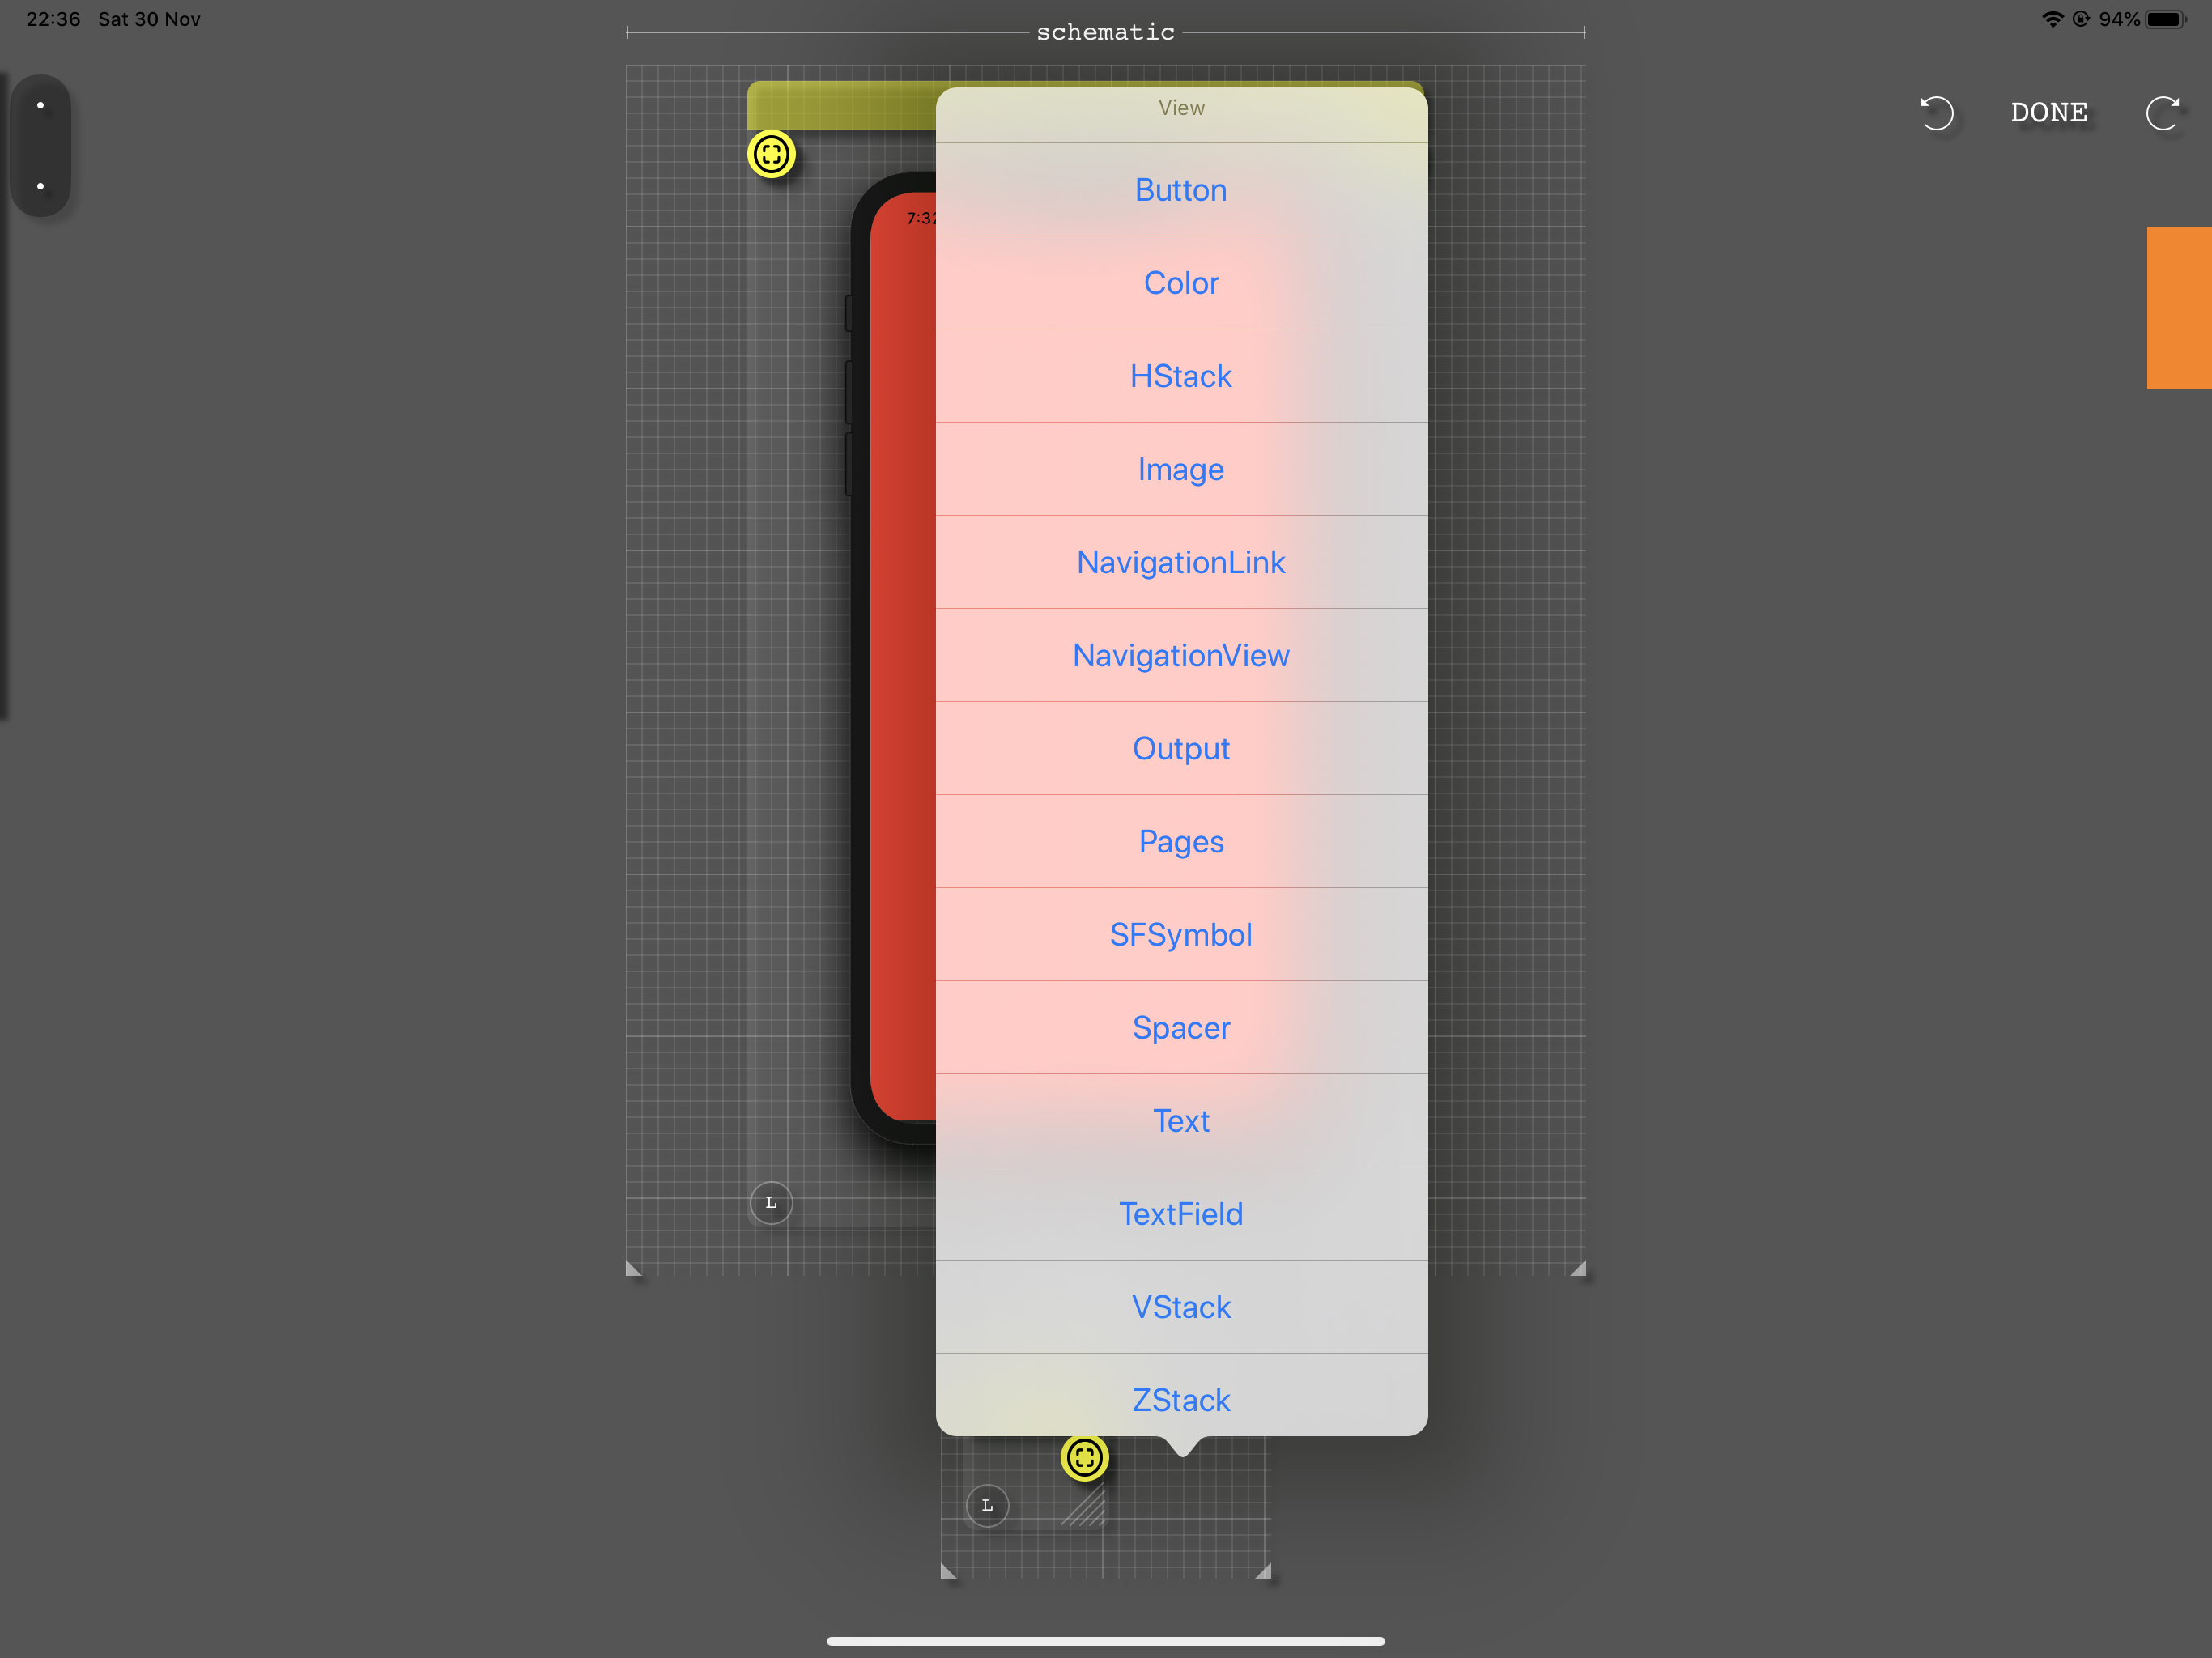
When the touch gesture ends, a context menu should appear as follows:
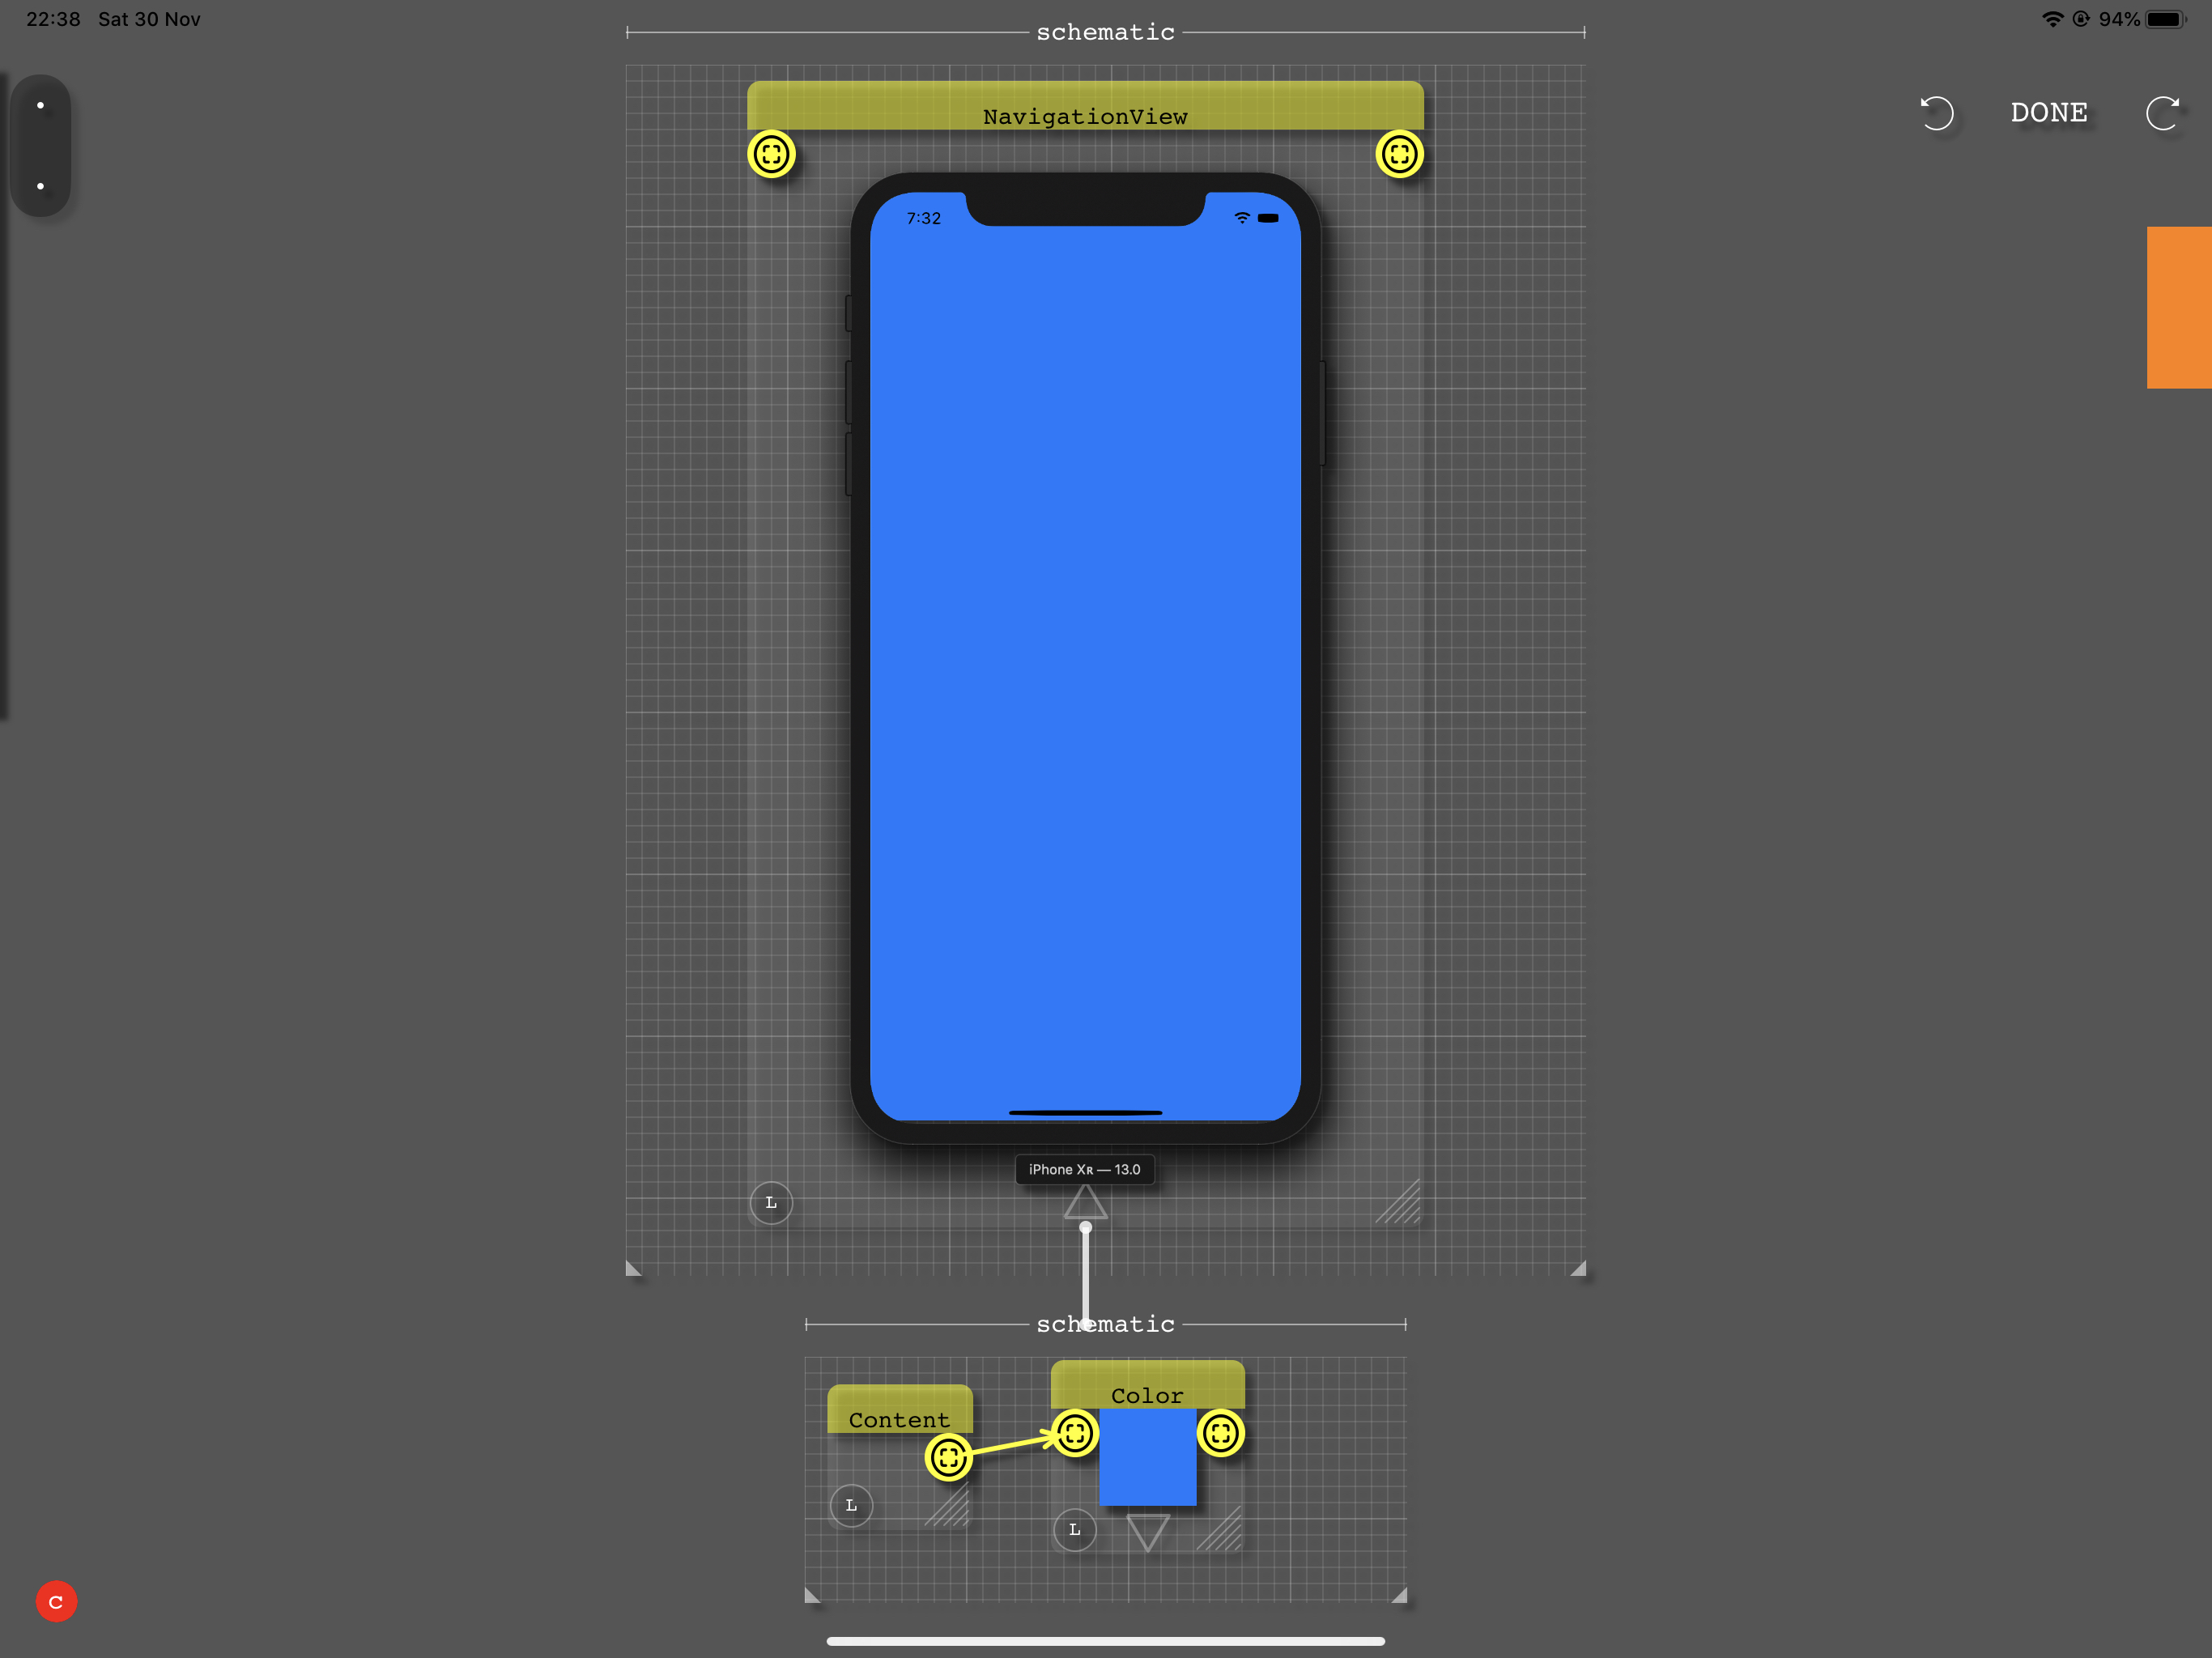
If you choose the Color component from the menu, the result is an app consisting of a blue page as follows:
VisualSwift follows the same concepts used by Apple’s SwiftUI. An important part of creating UI layouts are the Stack views: VStack, HStack and ZStack. For example, if you would want to layout 3 views vertically you’d use the VStack:
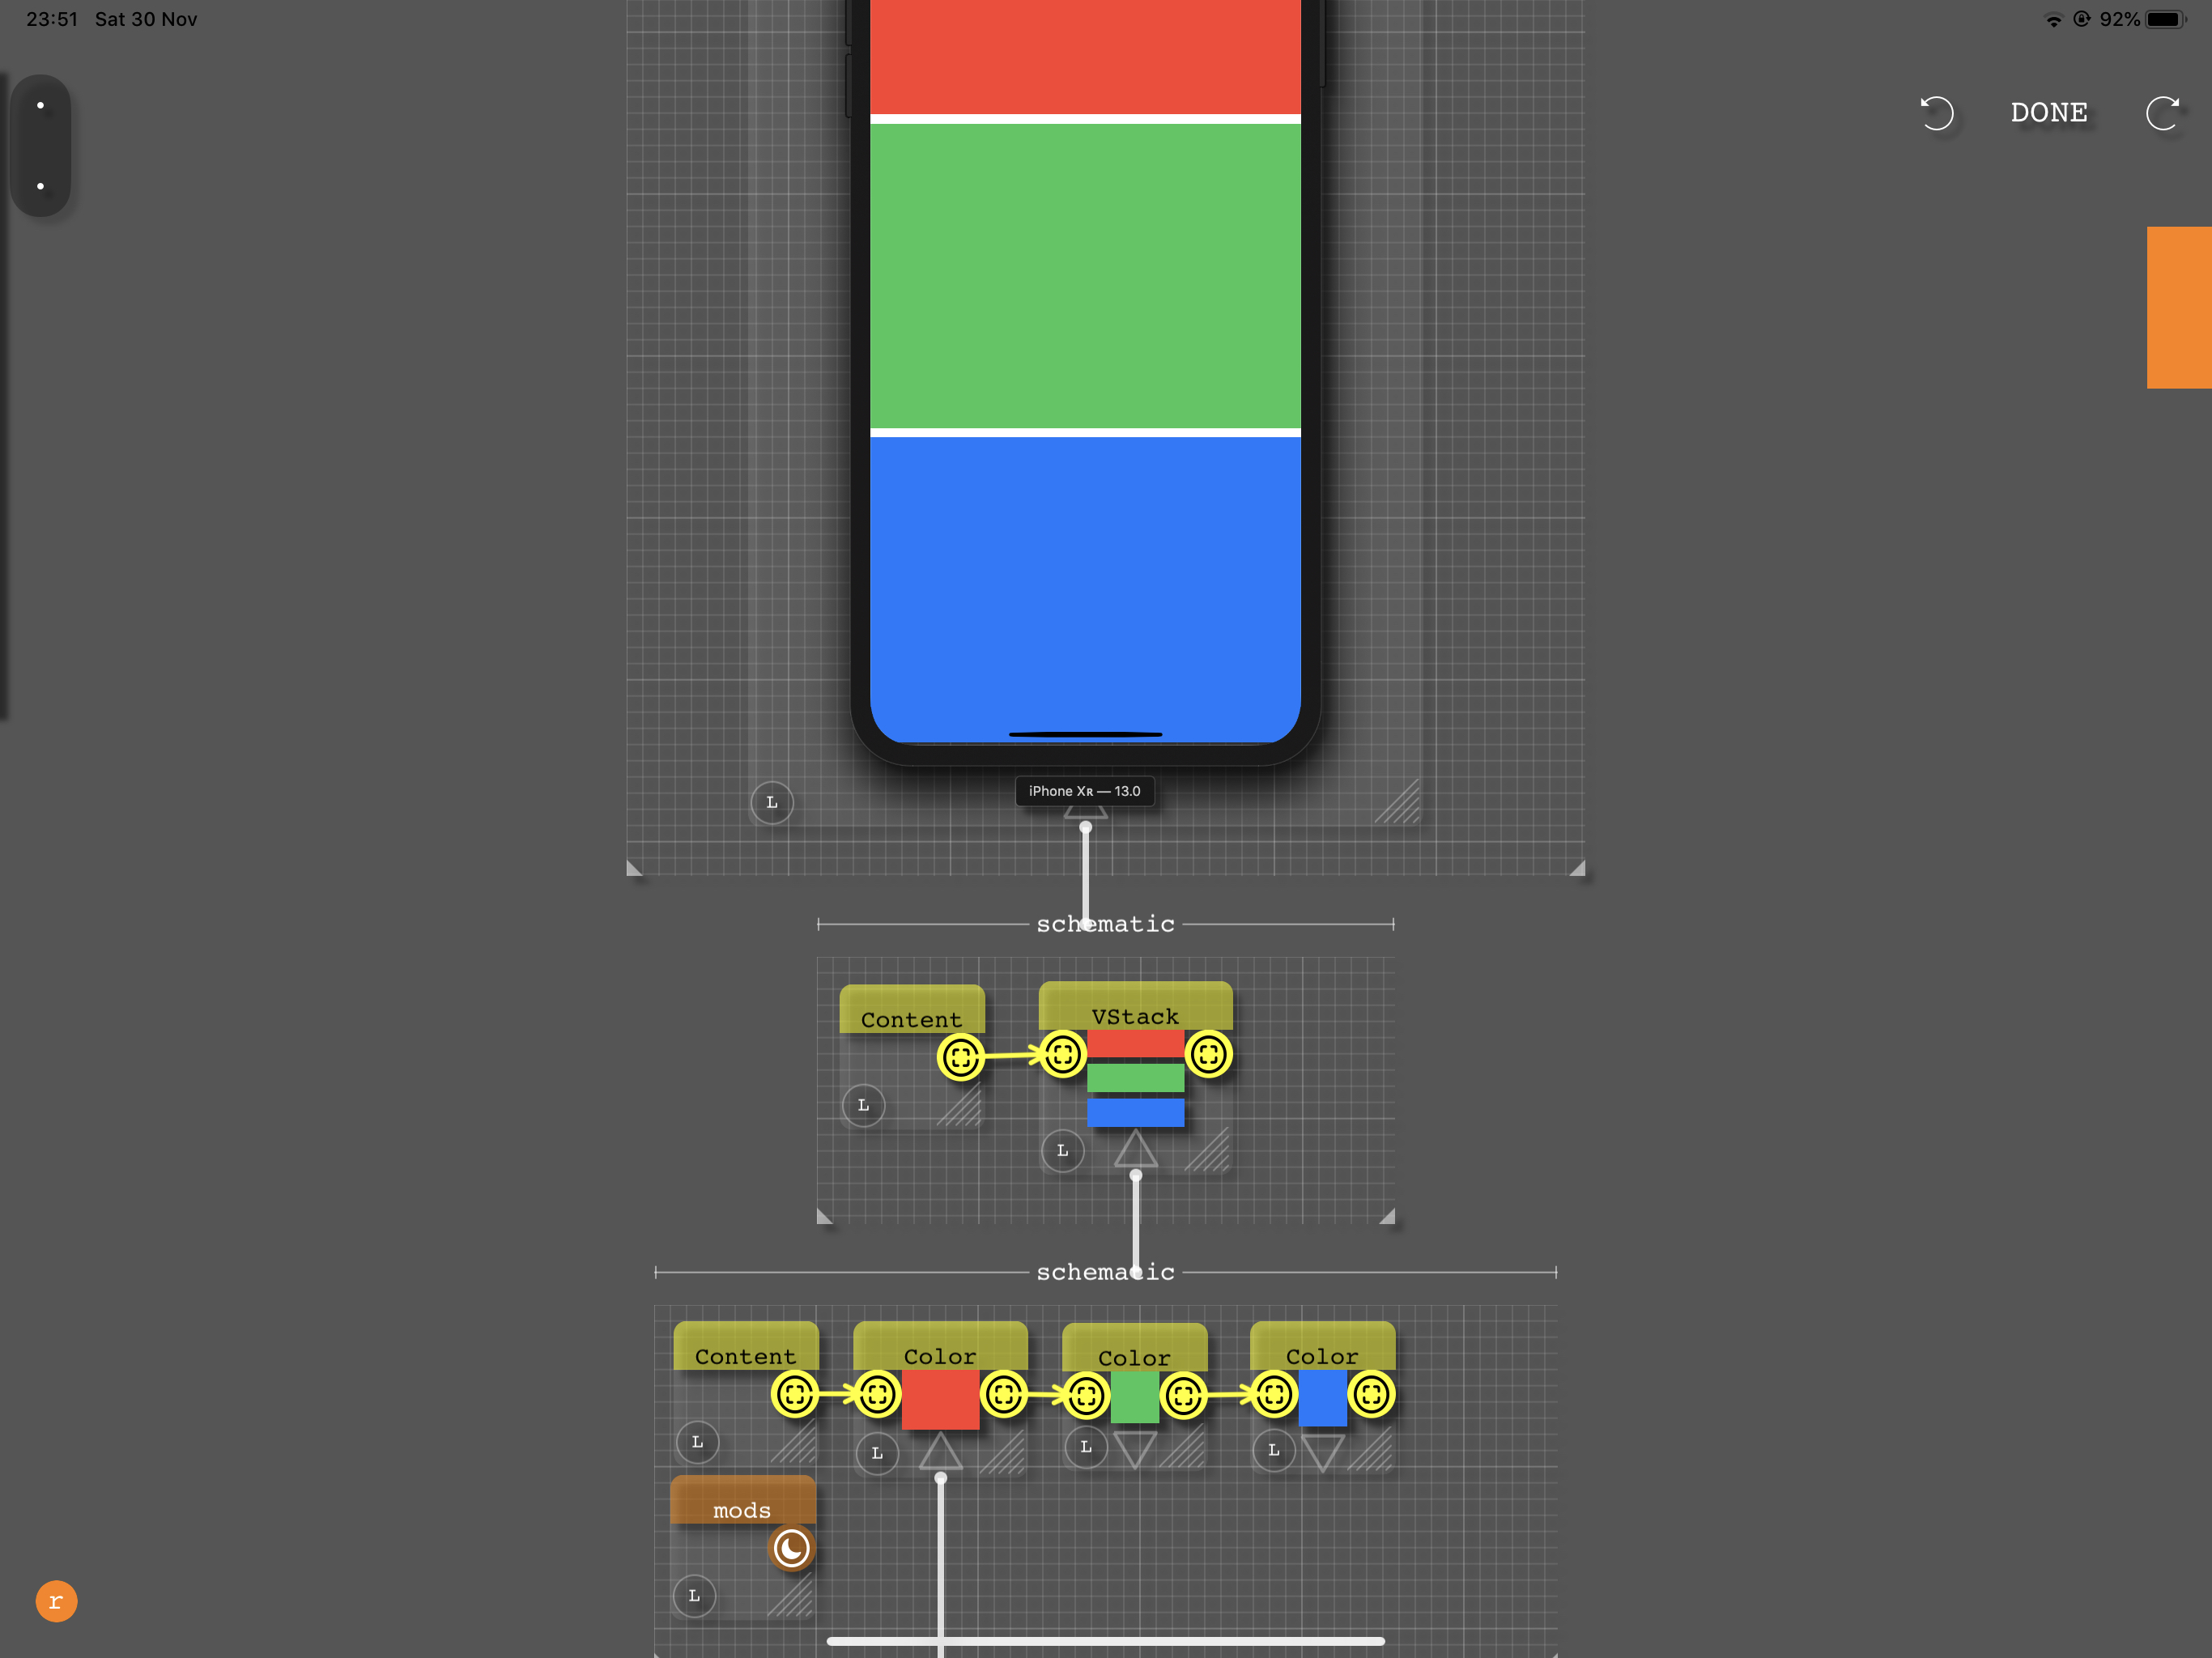
Now we have 3 schematics in 3 hierarchical levels. The root schematic consists of a NavigationView. Inside the NavigationView there is a VStack and inside the VStack 3 Color views with Red, Green and Blue colors.
If you replace the VStack with a HStack then you get the following:

Note that the VStack is still in the schematic inside the NavigationView but because it is disconnected from the Content component it’s not being used.
Just like in SwiftUI, modifiers can also be applied to views, this is done in a similar way to specifying the contents of a components but now instead of connecting from a Content component, you need to connect from the “mods” component. For example if you connect the mods component to a padding component the following happens:
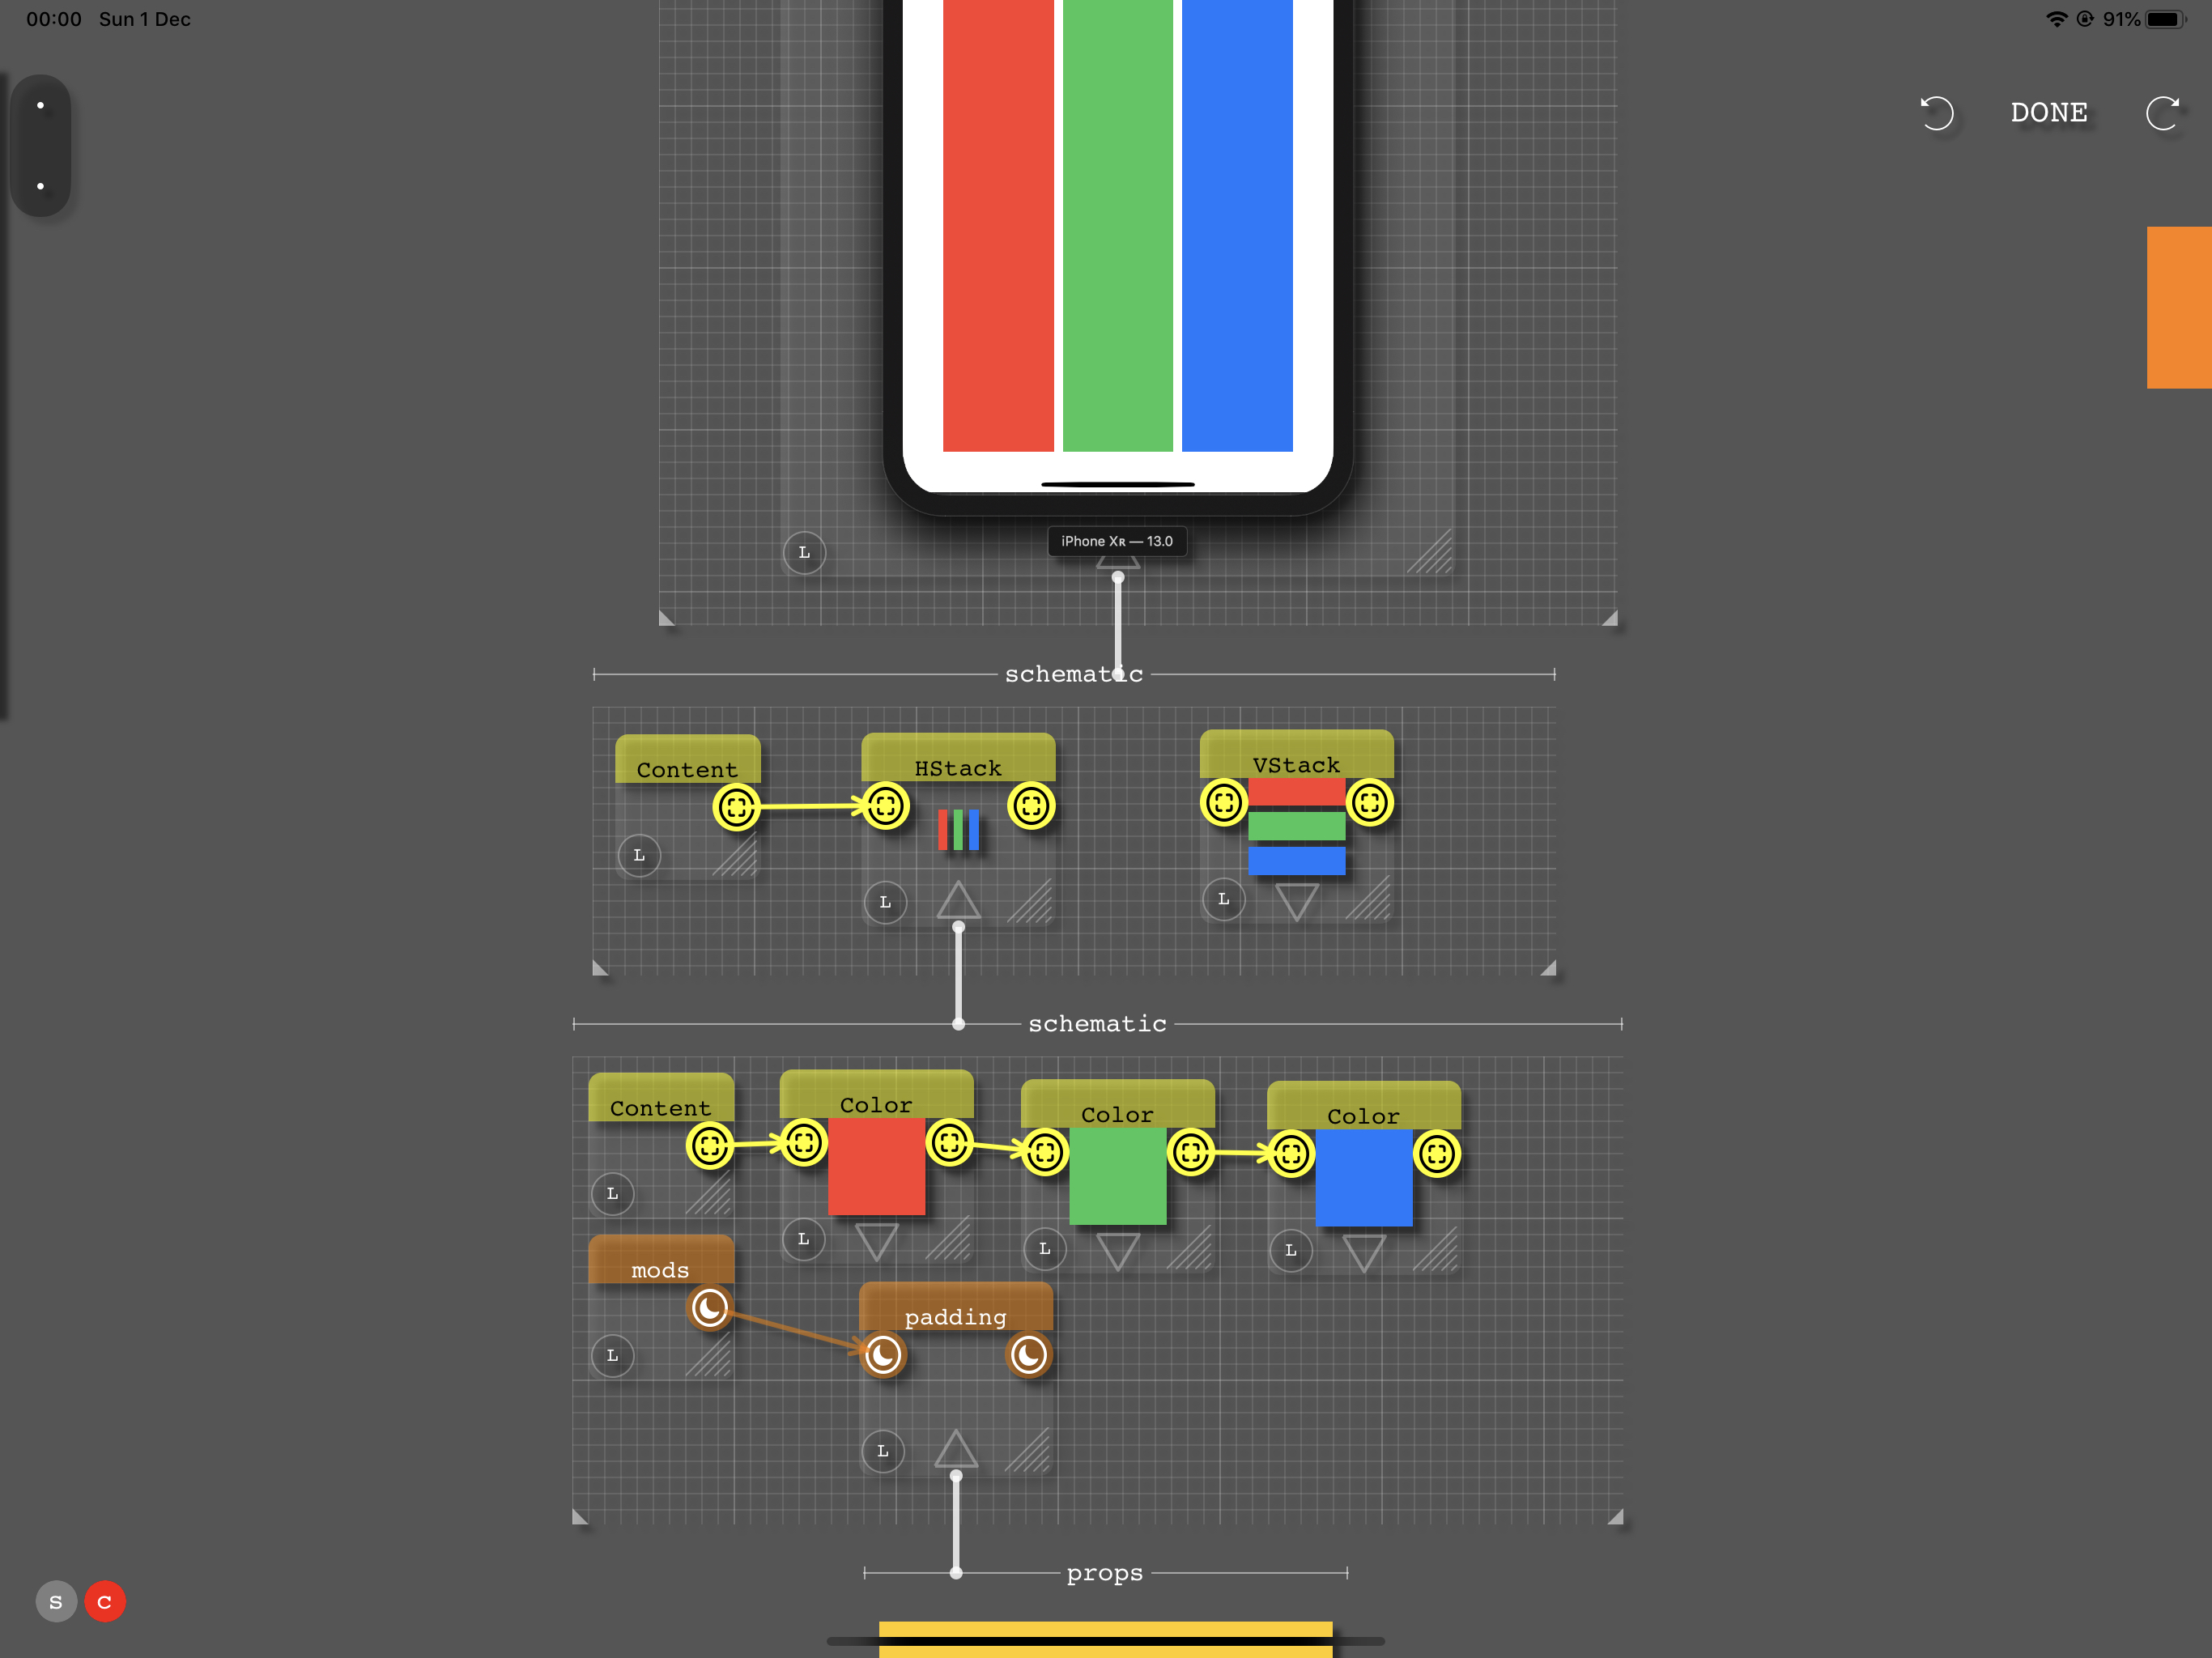
The page we have created now has been modified to have padding around it.
If we need the Swift code for our very simple app, we can slide the code panel from the right:
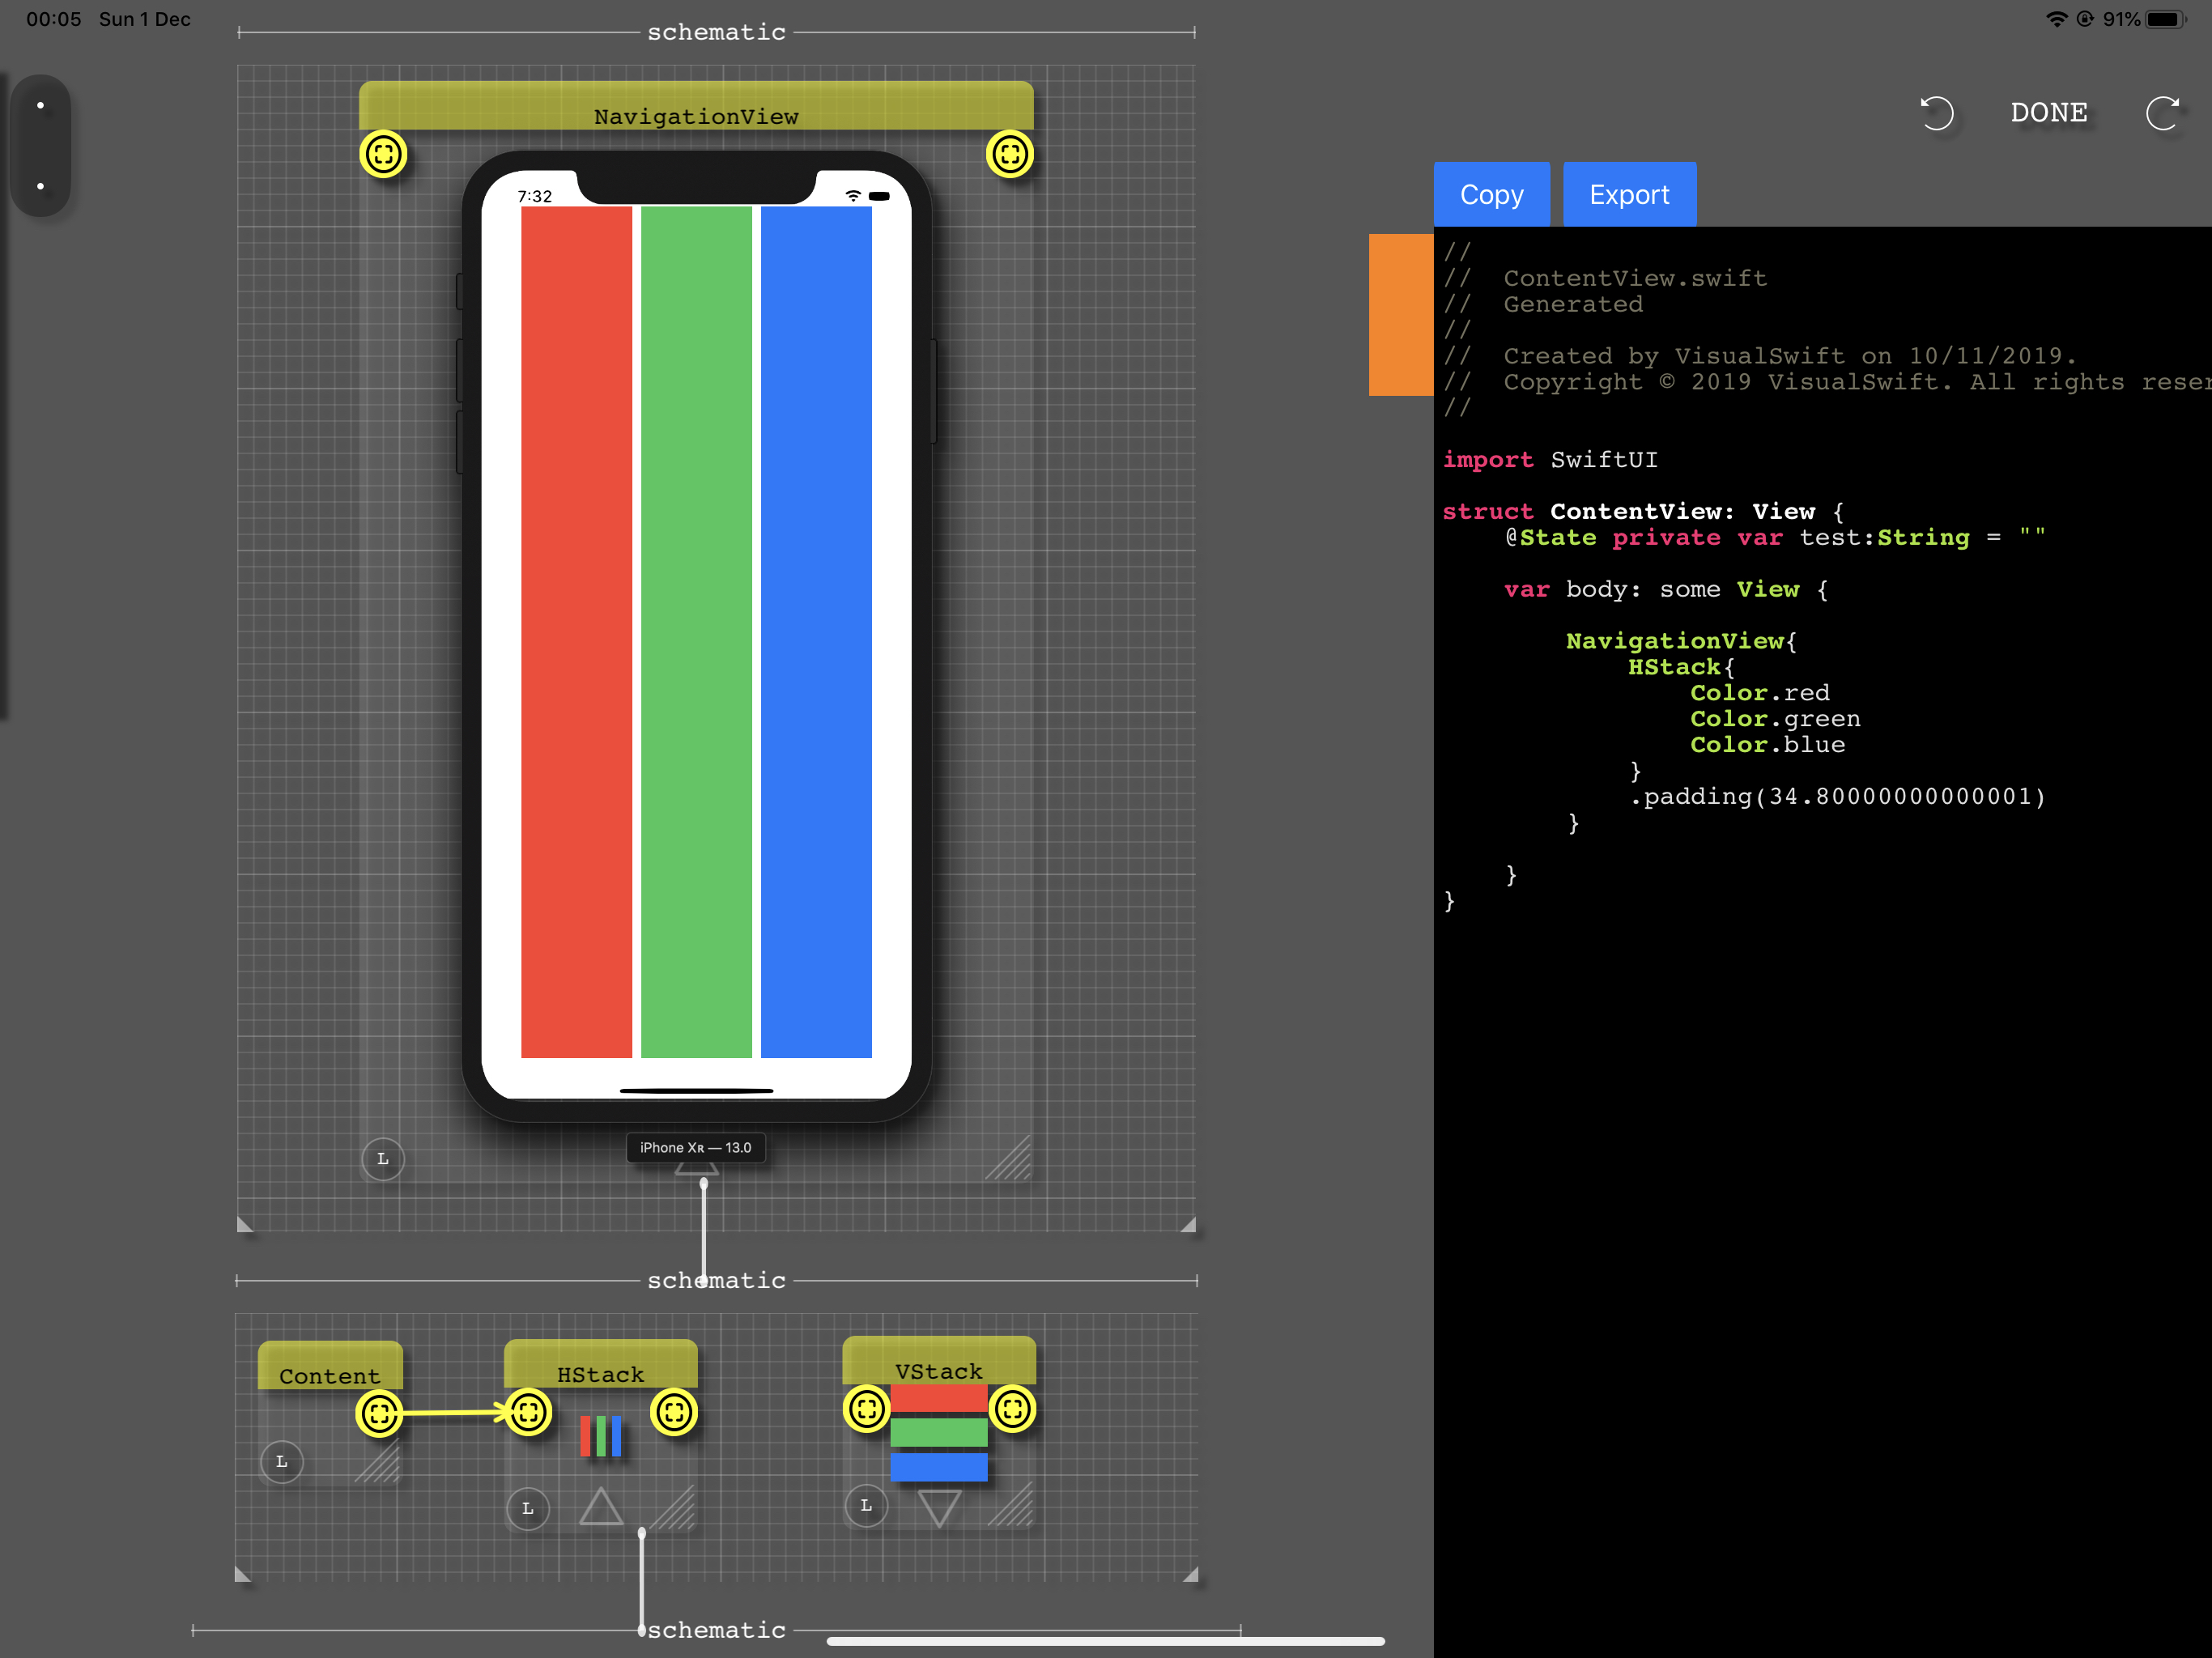
The swift code can then be copied or exported via the Pasteboard or Airdrop and pasted in an Xcode project for building the app.
This example was kept very simple on purpose, the more complex an application is, the more powerful and quick will be to work visually using Visual Programming in VisualSwift.
When you want to make changes to specific element on a page, you just drill down the visual hierarchy with each level isolating a smaller relevant part.
2 replies on “The basics of VisualSwift”
Been using flowstone for a few years on windows 8.1, made hundreds of schematics. I’d like to test this for MacOS.
I heard you are the original inventor of SynthMaker… I am honored to comment upon your website, Your Excellency.
Hi, Thanks for leaving a message and for showing an interest in testing the MacOS version of VisualSwift.
Apple doesn’t offer a way to test MacOS apps similar to TestFlight on iOS so to allow the app to run on your computer I’ll need your device id as explained at: https://help.apple.com/xcode/mac/current/#/dev93ef696c6
Please send it to me privately.
If you want to be more involved it would be great if you join the slack channel at:
https://join.slack.com/t/visualswift/shared_invite/enQtODkwNjk4MDk5MTkwLTk0NmE4NjBmYjZiOWU0N2I3NGYzOWUyYzE0MDRiOGI4NzlhNTI1NTJmMjJlMTVjOGJlYmY0MWY4YWM2ZDFiYjA